Complete Guide To Preventing And Fixing Candle Tunneling
What Is Candle Tunneling?
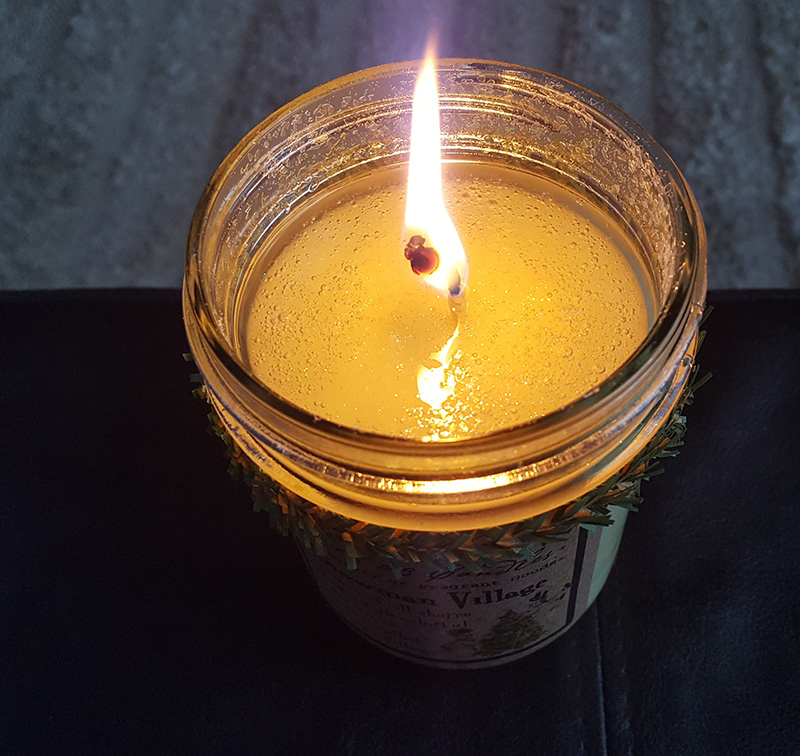
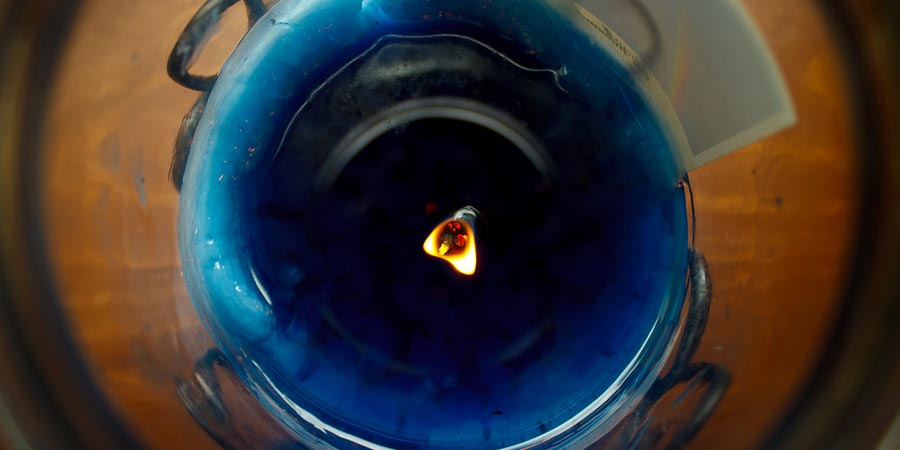
If you love candles as much as I do, you don’t want to waste a single drop of wax. When the flame begins to drop below the top-level of wax, leaving a dry, hard ring that just won’t melt, it’s called candle tunneling.
Novice candle fans might even think that’s just how certain candles are, but over time, especially with larger containers, the candle can become harder to light or it will go out, as wax burns from the top, and it might not relight at all. You can even lose your wick entirely. Luckily, there are things you can do to help your candles burn evenly and efficiently, with as little residual wax as possible.
How To Prevent Candles From Tunneling

Start Clean to Burn Clean
The first burn and the size of the initial wax pool sets the stage for everything. The longer your candle burns, the bigger the opening for future use. You might not even want to trim the wick that first time if it’s a wider container because a bigger, hotter flame could be the only way to melt the wax all the way out to the edge. But smoke and soot are never good for the wax, so keep a careful eye out for problems like that. Once the candle has formed a melt pool all the way to the edge of its container, extinguish the candle and trim it back a little using a wick trimmer such as the one here.
Tunneling is not only ugly, it’s wasteful. There shouldn’t be dark soot on the glass, and it should melt cleanly and evenly for roughly 1\4 inch. Burn the candle one hour, for every inch in width, depending on the wax and its quality, getting as close to the edge of the container as possible. Repeat this complete burn occasionally, throughout a candle’s life, to keep the wax open and even. Too many short burns will cause problems as well.
Make Wise Choices
“An ounce of prevention is worth a pound of cure,” – Benjamin Franklin
If you never burn your candles for more than an hour or two, pillar and large poured varieties are not your most economic and labor-free choice. Taper, votives, and tealights might suit your lifestyle better or smaller, narrower jars.
Some candles are also just poorly made in the first place and will probably tunnel no matter what you do because the wick is too small for the jar, or the wax is of poor quality. This means you will have to fix them more than once, and you might have problems with both the wax and the wick.
Remember, expensive and well-made are not always the same thing. You’re looking for quality, not money to burn. A good candle maker knows how to balance the wick size, wax type, size, and scent to produce a superior experience, and that’s what you’re looking for, not a constant hassle.
How To Fix Candle Tunneling
Fixing Wax Burning Problems
Are you already in trouble? If your candle is only burning straight down the middle, don’t worry. There is a way to fix it, but I’ll warn you now, it isn’t pretty, so it’s always better to avoid the problem with the best good candle burning practices.
If you try just removing the hard wax rim, it will probably tunnel again. What you need to do is to reset the wax memory, by wrapping the edge of the container or the top in a dome-tent of aluminum foil, with only a small opening at the top for air. Fold the foil over a few times to give it more structure and keep it in place. This will reflect more heat into the wax, but the sooner you step in to deal with the issue, the better, because too much liquid wax will drown the flame, and have to remove it. Below is a video using this very method:
Always watch this process carefully, so the entire thing doesn’t go up in flames, and don’t break maximum burn warnings from the manufacturer, or the glass might shatter. You might even want to do it in the kitchen sink, and be careful removing the foil. It will be hot.
If that doesn’t work, or you just get tired of burning yourself, you can always turn to a candle warmer like this or cut portions and melt the wax for its fragrance over a melt warmer. Hopefully, you’ll remember for next time, or buy something more suitable.
Candle Wick Too Short?
Short wicks can happen if you accidentally cut it too low while trimming, or it can break off when you’re handling it. Sometimes, it’s just made poorly to begin with. Tunneling can also drown or shorten a wick, as wax melts over top. Even after you’ve solved your wax issue, you might still need to deal with the wick, and it’s easier to do so before the wax dries and buries it completely. If it has just fallen into the liquid wax, try rescuing it with a pair of tweezers and holding it until it can stand up on its own again.
You can try carving around the wick so you can light it, but this might set off a wax problem again, especially if you dig too deep. The best way to deal with a short or buried wick is to melt the entire surface with a heat gun, and dump out the excess wax.
But, if you don’t have a heat gun, turn the candle on its side and melt the wax onto folded foil, or a foil pie pan, as evenly as possible and without burning yourself. Again, I suggest you do this in the kitchen sink. Then, straighten out the wick with your tweezers if necessary, and relight the candle, burning it until the wax melts right out to the edge.
Fixing a Dirty Wick or a Flickering Flame
Soot and smoke marks on the glass are another common problem, caused by incomplete combustion, often because the balance or consistency is off with the amount of liquid wax being drawn up by the wick. If the flame doesn’t get the right steady flow of fuel, it will flicker or smoke. The type and quality of wax has a lot to do with this process too. Soy candles, for example, are particularly known for their almost soot-free quality.
Burning candles in drafty conditions, like near an open window, fan or outside will also increase soot because it disturbs the flame and fuel balance as well. Any time you see the flame bouncing and changing in size, there is a problem, and it can affect the overall lifespan of your candle and cause tunneling.
Using a hurricane vase or tall cylinder seems like an easy solution for drafts, but it can also rob the flame of the oxygen it needs. It will suck in more air from the top, but the heated air also needs to get out. This can actually cause air turbulence and a draft of its own, and the flame will flicker as a result. You might have noticed that the further down a tall container a candle burns, the more soot and smoke there is. This is what is going on and causing the problem.
The best draft shields are open at both ends, allowing you to raise the container up by half an inch. You can also buy candle toppers for jar-style containers to help regulate air flow. The most important thing you can do though is to properly trim your wick to about 1\4 inch each time you light your candle. If the flame starts flickering after it has burned a while, and there is no draft, put it out, and trim it again.

Photo credits: Feature Image / Bottom Image


Have you ever tried a candle-topper.com top for candle jars? They work fantastic! I always called it candle coring, so I just learned something new when I read your blog. They definitely are more like a tunnel (the missing part) and less like an apple-core, which is the part leftover. :)-
Thanks!
Thank you soooo much! I love the terminology so now I know it. I’m using the foil on my candle I just got. It’s a vanilla cupcake yankee candle 22oz 1 wick. It’s incredible but my first light left slight tunnel. Omg I just check after 15 minutes if even and it worked!!! 😍 Thanks!!!
Great! I’m glad to hear that it worked for you 🙂
Please help. How can I Prevent shrinkage? Where the wax separates from the glass after the wax cools?
I’ve benn having problems with candles from aldi all tunneling no matter how long i burn them. Burned a small 2.5 in one last night for 4-5 hours, and it had already formed a tunnel and left a full 1/4 rim maybe a little more. I had a 3 wick one before and it never melted the edges either. Do i just give up on that brand? Or can they be saved somehow?
I have been completely unsuccessful in trying to prevent tunneling. I burn my candles until they are flat, and when I relight them, they still tunnel.. I am dealing with beeswax. I burn them flat, and then I have practically no candle left to burn. I get maybe an hour out of a votive. Seems terribly wasteful. I’ve tried the foil “hood,, too, but it will not melt the wall of wax up against the side of the tin. I love candles, but I am obviously doing something wrong. I have thrown away almost $50 trying to get this right. What about a triple wick candle?
Hi Judy, I don’t have a ton of experience with beeswax candles so I can’t say for sure why a specific candle may continue doing that. It could just be the brand of candle maybe? As for the triple wick candles, it should definitely help with preventing tunneling! Most of the triple wick candles that I have gotten have had no issues with tunneling. If anything, the triple wick candles will burn flat but also use up the wax too quickly. Better than having left over wax though.
This blog about Preventing And Fixing Candle Tunneling has
helped me a lot, is very well written. I used this
fat burner product: and I reached the ideal weight.
Kiss you All!
When you get a new candle before you lied it sprinkle salt on the top. about the same amount as if you were sprinkling it on food. keep it even when you lied it so the salt doesn’t roll to one side. this will make it burn evenly and it will not tunnel. Plus it will extend the life of the candle. Any candle you have where the tunneling is bad just chop the rest of it up that’s in there put it in a dish and use it as wax warmers.
Does the colour of the wax affect the burn? I always find the darker the wax I.e. dark red or green the less likely it is to pool and burn evenly. Maybe it’s just me?